Showing posts with label structural repair. Show all posts

Wednesday, May 02, 2007

A Weighty Task

Spring has sprung. It's hot. But not really hot enough for air conditioners, unless we don't open the windows. Which, mostly wasn't possible, so we had to borrow an a/c unit from my mother. I'm putting screens into the storm windows right and left, but getting all the windows open, and keeping them that way is a nightmare. We ran out of short pieces of wood.

What's wrong with the windows, you might ask? You didn't ask. Well, I'll ask for you, in the interest of moving us all along.

The windows are quite well preserved, except for a couple in the dining room bay, but nearly all the sash cords have gone. All but one set, on the only window that apparently never got sunbaked. That window has been open for weeks, since it's now indoors, on both sides, and opening it does us no good. I replaced a set of cords in my son's bedroom, and I think I replaced a set in the back room (hereafter referred to as the Hole, until it's cleared and made into the dressing room), last summer.

Some progress, but not enough. No openable windows in, say, the kitchen, or the dining room, or the living room. We had used up the little bits of wood propping open our bedroom windows. So sleeping was possible. It was unbearable, even with fans everywhere, and mom's little borrowed a/c unit. Too hot.
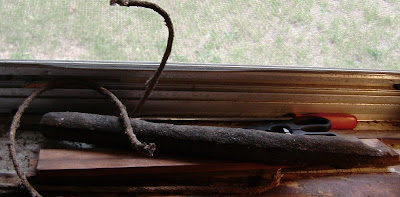
So, I started the interminable task of pulling out bottom sashes and prying out access boards yesterday. I started with the other window in my son's room, so he could get actual cross-ventilation, and while I was working on it, I decided to take photos. For everyone else, of course. I really don't need a picture of this to remember it:

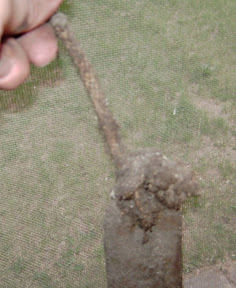
Yum. It's like a big metal poop, but covered with 80 years of dust and dead spiders. Just makes you want to do this, doesn't it? Actually, looking at this, you can kind of see why people just quit replacing the cords.

Let's start at the beginning. It's much less disgusting.

These instructions are for a "modern" house with repair access ports designed into the frames. You can tell if you have these by opening the window and looking for joints and/or screws in the tracks. Also, even though all our windows are double-hung, the upper sashes are painted into place and their cords are (unsurprisingly, as they were protected from the sun) in fine shape, so we're only working with the lower, inner sash and its cords. Pulling both sashes, stripping and restoring full sash movement is a whole other kettle of lead paint chips.

If you have a house that doesn't have this modern convenience added to the traditional double-hung window, you'll have to pull the trim to access the channels.

Get real replacement sash cords, not nylon (or any other synthetic rope - it won't hold the knots well at all) or cheap cotton cord (not strong enough). It's fairly high-test, and is treated with a very grabby sizing to help it keep the knots. You'll also need a hammer, a large flathead screwdriver or small prybar, a screwdriver for removing and replacing any screws, and a cutting implement. Another thing you want is a long stiff piece of wire with an open hook at one end - a repurposed coathanger is perfect. More on this later.

First, pry off the stop moldings, gently, and set aside. If there is a single cord, or if you are replacing cord before it gives way, cut the cord now. Grasp the lower sash firmly and pull it straight out and set aside, somewhere you won't step into or kick it. I know you won't and you know you won't, but do you want add a trip to the hospital and the home store, plus recreational re-glazing to your day?

Now, if there are screws holding in the access panels, rather than just friction and the pressure of the stop molding, remove them and put them somewhere safe, like a cup. You'll probably find some evidence of previous repairs, as I did. Only two of the prymarks I left behind were mine - the other dozen were already there. Clearly the cords had been replaced before.
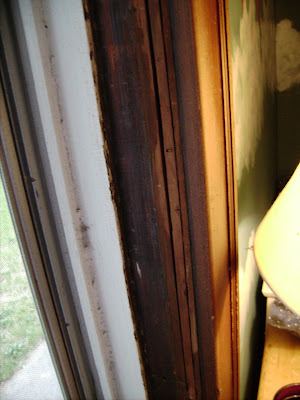

Start by prying carefully. There might be a small nail securing the panel (these are under the window trim, where they occur, at my house, which meant either pulling the trim -all of it- or hacksawing the nail). Remove or cut the nail, depending on your level of commitment. The edge that is secured by this mail occurs under the stop moldings at my house, so I just cut the nail. Continue prying gently until the panel pops out.
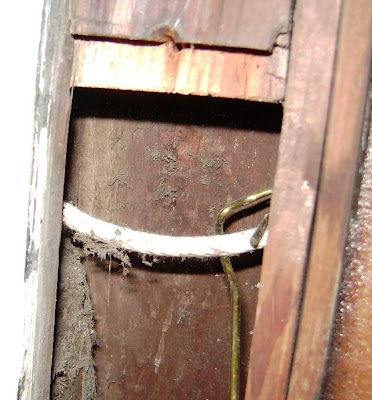
You may have to pull it out after the leading edge is free, since the center stop molding is still there. One edge is often under that. Once it's out, we get to do the fun part.

Deeee-lish-us. Reach in there and grab the weight and pull it out. Wear gloves if you like - our weights are iron, but as often, they can be lead. Look at the knot configuration, if you can. You probably can't, if it looks anything like the example weight does:

Let's wrestle that a little bit. This better? No?
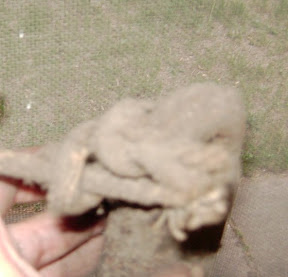
Well, okay, I'll demonstrate the not-so-arcane-after-all knotting technique after we get the new cord through the pulley and out where we can reach it. Measure the length you'll need the cords - measure how far down the sash the cord groove goes, plus the length from the top of the pulley to the top of the weight (if you stood it up on the windowsill), and the cord should be long enough. Add three inches if you are worried.

Tie a plain old half-hitch close to one end, and pull it as tight as you can.

Then thread the other end through the top of the pulley, push every bit through until you get to the knot.

If you are really lucky, the cord will just snake down the inside and fall out the opening. However, this is unlikely, so use that long wire hook to fish around up there and pull the cord through.

Take the end of the cord and thread it through the hole in the weight. You should have enough slack to do this pretty easily, but not so much that the weight can lie on the windowsill while you work. I propped the weight up in the outer slide channel and the worked fine.


Now, tie another firm half hitch close to the end.
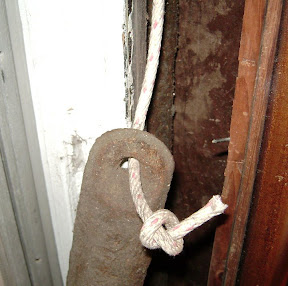
This would be the not-as-arcane-as-you-think knotting method. Next, pull the knot up, wrap it around the cord, and "button" it through the resulting loop. Step 1:
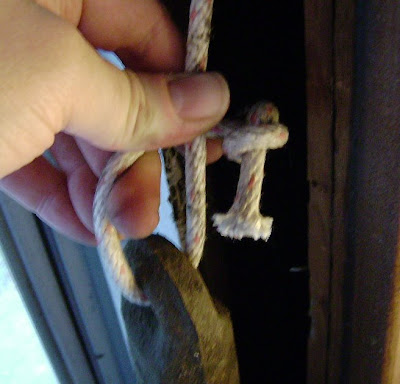
Step 2:
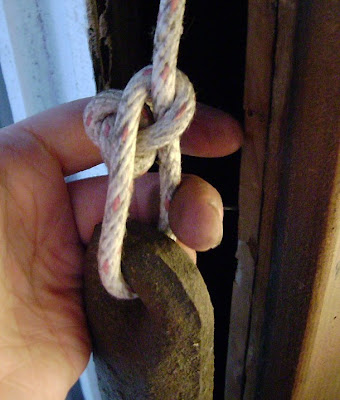
Then pull tight to secure it.
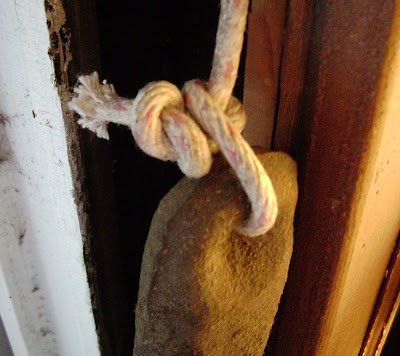
Put the weight back in the weight channel, and close up the access port. Repeat on the other side. Get the sash, and remove any remaining old cords from the cord grooves. Get another person to hold the sash (or prop it on something secure), make sure you've got the right side of the sash facing in, pull the knots down from the pulleys and tuck them into the holes for the knots, then push the cords into the grooves. The sash should now be hanging freely in the window, and shoudl slide easily up and down. Re-install the stop moldings (if you pulled the trim, re-install that, too), and you're done.

Saturday, April 07, 2007

Terrors in the Night, or Clown House Repairs

...actually, bad/strange/funny dreams with more house relevance, rather than real disasters. Which would you choose? I thought so.

My dream began with us sitting on the front porch, talking (a transcript is not available as the soundtrack has bee lost), followed by an enormous "runch" sort of noise and the building shuddering, with the center third of the house, and only that portion, listing to one side. After much comical sliding around, all of us rush downstairs, to the cellar.

There is an enormous soft spot in the foundation, as if the blocks had deflated. We immediately produce pole jacks from nowhere (I seem to recall them unfolding neatly from our pockets - that'd be nice, wouldn't it?) and jack the house back into its normal position. We're all wearing brightly colored overalls at this point.

Then we produce cans of "inflatable paste" which is then used to repair the wall. I think it's manufactured by the same imaginary company that makes Prognostikote. I don't recall there actually being air pumps, but there probably were. There were balloons, but I'm not sure what they were for. There were the long skinny kind, used for making animals. And a lot of slapstick.

Eventually we finished the repair and went back upstairs.

Do you think my house is trying to tell me something? We haven't had much time to work on it, beyond the Day Of Muck, for several weeks.

Incidentally, I'm not afraid of clowns.

Wednesday, January 10, 2007

Writer's Block, or Living in the Project

NOTHING says "house restoration" like patched plaster walls, an extension cord, and a bale of toilet paper. Except possibly the direct view to the bathroom from the front door, and a nifty sepia effect courtesy my camera.

So, here I am, camera in hand, readied to relate the news of living in the house for a whopping 2 weeks, and I find that my grasp of words has failed me.

Utterly.

I find myself thinking "Kitchen ... NO! Bathroom ... wait. Bedroom. Plaster? Yardwork? Snow?" This is followed by a dull moaning sound as my brain's gears fail. Madly, I continue to hunt for things to write about, grasping at "Scrubbing floors, perhaps? Or the kitchen drains? Oooo! How about the cellar?"

I'm not short of things to write about. I'm spoiled for choice. My brain is whirling like a magpie in a sequin factory. Too much to do, too much to tell, not enough focus.

Therefore, with this decision (or lack thereof), I give you some photographs. And some captions. That's all I can muster right now.


Bath, before and after. See if you can guess which is which! My best clue for you is that there's no Homart plastic tiles in the restored bathroom. Or pink. I'm not a pink person.


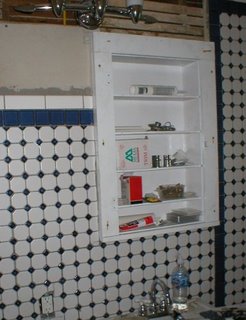
Here's the Original Medicine Cabinet, the one I bragged about finding so long ago, in her almost completed state (note the smears of wood filler). All installed, but not really finished yet. I'm putting off the rest of the paintjob until I get time to pull and strip (or replace with chrome copies) the hardware. The existing stuff is brass and would look ... odd, with the rest of the bath hardware being chrome.


Look, that's food in the kitchen, and not tools! Okay, some of those are tools, but mostly it's actual kitchen stuff. We can cook in here now, as of about a week ago. The first week, though, it was pretty grim, and we didn't get the tools packed of to the cellar until we were nearly starving for a lack of cooking space.


And, as promised, an image of (part of) the Giant Bed. It really does barely fit in the expanded master bedroom. This was the best picture I could get, as it's what was framed in the door. That's the baby napping on the bed, he gets his crib tomorrow. It's huge.


I will close with an image of the no-longer-hellish dining room ceiling, with the pretty, new, unfinished, "beam" for all to see. The real beam is actually much further up in the wall, and the posts against the walls are as cosmetic as the cladding over where the beam ought to be cosmetically (structurally, it's fine where it is). Don't look at the piles of boxes, please. Just pretend they aren't there.

That's what we do.

Tuesday, December 05, 2006

Amazing Progress, Due to Unbearable Pressure

As everyone knows, we are under a lot of pressure around here to get done and moved in as soon as possible. So, with that bearing down upon us, (and the help of our dear friends) we have made some progress.

Thanks to J, the furnace is on a real electrical line (meaning, of course, the electric pilot sparker and the thermostat line), and most of the heat vents have now been vacuumed. The rest will be cleaned out tomorrow, and then the intake filter will get cleaned and we can throw the switch, turn on the gas, light the pilots and work in a warm house. We also magically have lights in the kitchen, with a bonus lightswitch!

The dining room bay has been reframed (where necessary), insulated (Hurrah! now the heat won't be sent directly out of the house from the vents in the bay!), and sheetrocked. It looks astonishingly civilized, barring the untaped seams.

The last remains of the old, nonfunctional, passthrough closet in the master bedroom were demo'd out, and the floor given a temporary patchjob. Relaying the boards and refinishing can wait, honestly. We have a nice seagrass rug I intend to tack down over the ugliness. All that remains in there is to remove Far Too Much Wallpaper, patching where that pesky wall was torn out, painting, and replacing the mouldings. We are now, as of tonight, properly armed with a scoring tool and more blades for the scraper, and I expect to be doing battle with the Powers Of Evil (six layers of old paper with two layers of paint) by Thursday.

The bathroom isn't any closer than last reported, but we did buy the rest of the tile, and found out how to return the extra. How did we end up with nearly 10 extra linear feet of edging tile? You tell me. The math checks out, but I must have overbought. Oh, and we did buy more grout, just in case. We can return that too, if we have to.

Yet to do, and urgently needed, is the ripping out and replacement of the hopelessly fractured dining room ceiling plaster. In addition to the quarter of it that has already fallen away, leaving a breathtaking view of the attic through the exposed lath, there is a large section - say 1/3 - that is partially keyed, but hanging onto lath that has almost entirely separated from the beams down the center of the room. This problem was made worse (as was to be expected) by our re-squaring of the dining room when we added the support posts a couple of months ago. The plaster's not salvageable in the time we have, so it must go. We have already purchased the drywall, and we have a plan of action that includes saving as much as possible of the original plaster, even giving our pressing schedule.

I still need to scrape, patch and paint the West wall of the kitchen, and re-engineer the sink cabinet drawers and doors, but mostly, the kitchen is at a "usable" stage, once the gas is on. There's stuff to do, but it's little stuff, by comparison.

I think we might just get moved in before Chris goes. This is my driving force, to have our home be our home, even for a little while, before he is gone for so long.

No pictures today, and probably not for a few days. The work is more important than the talking about it, but I promise to keep y'all posted on progress, even if it's short.

Friday, September 15, 2006

I must be psychic.

Many months ago, I wrote this:

There's a sag in the diningroom, at the join between the bay and the original construction. Things Must Be Done About This, as it is just sort of hanging in space. I see beams in my future, and screwjacks, and pain.


Wow, was I ever right. Last night we pretty much rebuilt the dining room wall where it meets the bay addition. There were beams, and jacks, and pain. My back hurts, and I bet K's head hurts. The planned posts are in now, and the look as nice as I thought they might, even without the mouldings and with unfinished walls.

We used 2 boxes of screws, and we are going to use more when we finish the job. We spent 50 bucks on securing hardware to prevent wigglyness today.

As an aside, while I LOVE visiting the hardware store, I HATE how it eats up a whole day. I also hate how money flits swiftly from our wallets seemingly by our very presence in the store.

It's the price of our passion, I suppose. The house, she demands it, and we must obey.

Also, StuccoHouse noticed that we were mentioned in print. I am shocked, honestly, that anybody reads this at all. It's nice to know that somebody reads from time to time, but I've been just sort of madly raving into the ether for months now.

Sunday, September 10, 2006

Progressions, Plans and a Thing In The Attic

So, it's Autumn, we've owned our home for 6 months (only 6? it feels like an eternity), and we've made some small progress. There's paint in the hallway now, a "Very Craftsman" green, according to Mom, and I'm working my way around the dining room. We've got all the floors clean of hideous carpet, though some are a little scarred from the experience. The living room is done, save for scouring the floor to remove the last of the carpet pad, and I've got a lovely play area set up for my older son to use while we work. The bath is half tiled, and the master bedroom still languishes, but at least there's a light in there. Things are moving along, if slowly.

I'm aiming for Hallowe'en as our move-in goal.

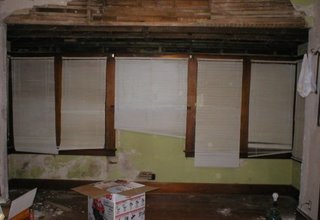
I have made some sketches of what I'm doing with parts of the house. My plan for the dining room bay is to take this:
hideous before picture
The dining room bay as it appears now.

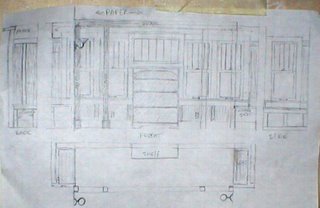
And turn it into this:
Bay Plans

I made the sketch without looking at the bay so I misdrew the windows - they actually cover the full width of the bay. Other than that, it's spot on. The posts are structural, not just cosmetic. They will support the poorly-remodeled wall cutout on a 4x4 beam, and we've got plenty of mouldings to wrap them with, to make them look Really Original. Eventually, I'd like to add cosmetic ceiling beams to the dining room, too, but this comes first.

The bookshelf is actually a family heirloom, which belonged to my paternal grandmother. It's going to be mounted permanently to the wall, and there will be wainscot added around it, right up to the vertical posts at the corners. It'll be the same as the panelling in the "built-in" I made to fill the arch.

The window seats will be made of the salvageable parts of the old living room archway double doors, which apparently sat unloved for many years in some leaky place. The bottoms have completely rotted, leaving me with a nifty, but not reusable, item. I decided (since I can't replace them where they belong, and because I want to make them again a part of the house), to make window seats of them. Also, the bay is only 4 feet wide, the ends are not evenly deep, and that space is nearly wasted. Finally, it is because I have really fond memories of the enormous window seat in the dining room of my parents' craftsman bungalow when I was a kid. Nothing like curling up in a sunny window with a good book. I want my kids to have that.

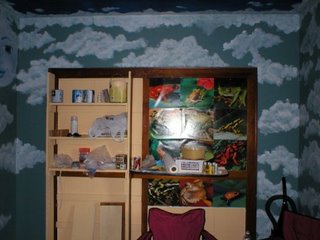
Speaking of kids, I'm still working on FX's room. When last I posted about it, we were here:
boy's room built-inThere are a few more shelves in the bookshelf, but it pretty much still looks this way now.

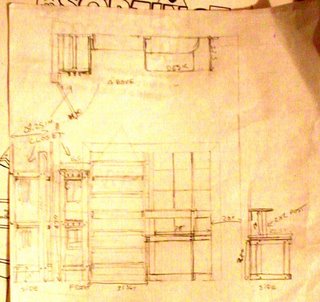
And we (which really means "I") plan to finish it thusly:
Plans! Such plans we have!

That's going to be an open closet with coat hooks on the outside, and shelves for shoes. The closet will have an upper and lower level, the upper one being for things he wears every once in a while (Sunday or seasonal clothes) and the lower being for his school clothes. The desk in the plans is all cut out, but not assembled.

Now to the progress. Quite a bit has been done, some has even been reported, none has been photographed ... Until now!
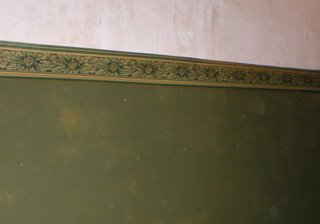
The Very Craftsman Green hallwayThe Very Craftsman Green hallway.

That's just bare old plaster above the border. The frieze paper (really only by virtue of position - its only pattern is a sort of golden parchment look) goes up after the whole dining room and hallway are painted, and really will look more like an intended plaster finish similar to what's there now, but without the obvious patches and old mucilage. I love how the border paper looks, even if it's only tacked up.

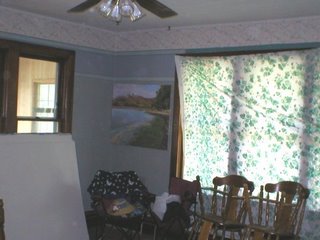
The dark green will make a lovely background for two paintings, done by my cousin, that I was given. You can see one if them in the photo of the living room:

It'll be nice when there's furniture in it. Not lawn furniture.It'll be nice when there's furniture in it. Not lawn furniture.

I love that vintage Greek key paper, but there wasn't quite enough. I have to make some more, which will involve printing it on archival quality paper and pasting it up. It's always something :)

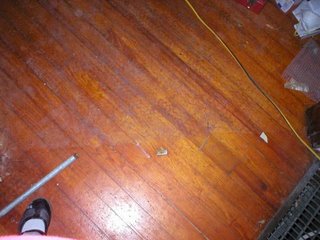
Now, the floor. Here, you can see the line of demarcation between the dining room and living room where the two different carpets once laid edge-to-edge:

Seamy, isn't it?Seamy, Isn't it?

Yes, I figure they didn't strip off the old wax prior to laying down a pink rubber carpet pad however umpteen years ago, so when the pad degraded, it bonded to the old wax, leaving ... this. This is after scraping for two days. I'll keep you posted on the scrubbing and what works. Once it's scrubbed, I'm waxing it.

Call me old-fashioned, or call me masochistic - we do have 2 kids and a dog - I like waxed floors, even if I know what it takes to keep them up.

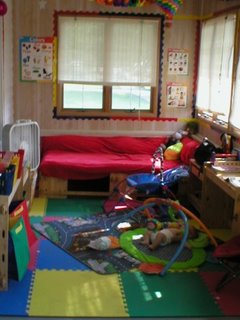
And now for the playroom:
Playroom

It's not perfect, but it's a nice, bright, stimulating environment for a 3 year old boy. And he loves it, which is what counts.

On to the half-tiled bath. First, a before picture is in order:


It was very pink, and plastic, in there.

Now, we have this:
tiled wall with medicine cabinetThat's the "fixture wall" with the new/old medicine cabinet in it, sans door.

We were lucky enough to find the old girl under the dining room bay, and she's sound, so I painted her and in she went. The mirrored door is in the kitchen until we're all done flinging heavy stuff around in the bathroom. I wish I had time to finish in there right now, but I don't.

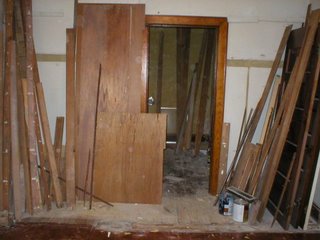
And the master bedroom currently houses all the salvaged lumber, mouldings, doors and panelling:
piles of wood!Sad, isn't it? Eventually, we will have to sleep in here.

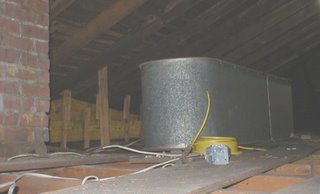
Finally, we come to The Thing in the Attic:
The Titanic, or our cistern.The Titanic, or our cistern.

A few months back, when I wasn't allowed up on ladders, my friend K stuck her head up in the attic where her husband J had been working to look for a tool we needed (we were demoing something), and said: "Hey! There's some kind of wash tub up here!"

I, of course, pictured a round tin tub, with handles, like the sort that get sold for icing down beers, and thought "Cool! I could use that for something."

Many weeks later, I stick my own head up there and see this HUGE bathtub shaped thing, about 4 feet wide and maybe 8 or 9 feet long, and a good 4 feet high. It must be the old water-pressurizing cistern, and must have been in here since the place was built. The way these things worked was that you'd pump water up here from the well, by hand, and it would sit up here until you turned on the taps, which would give you water pressure, like a water tower. It certainly goes a long way toward explaining some of the odd plumbing in the basement.

Now, what are we going to do with it if we ever decide to finish the attic?

Monday, August 21, 2006

Why I Love My Dad, and other reasons it's good to be a 2nd generation rehabber

My dad, though we don't always see eye-to-eye, is a great guy. He does things that drive me nuts (whose dad doesn't?), and amazing things that make me cry from their sheer wonderfulness. For example, when he helped us finance the house purchase, and what he did this weekend.

He's spent the past two days demoing out the powdered dryrot, painting what's left with Cuprinol (so I, breastfeeding mommy, don't have to), and reframing the now-missing bits. In between, while waiting for the copper green to dry, he's removing all the remaining carpet tackstrips.

I told him not to worry about insulating the addition or drywalling it, because I can do that, and also because he's one of those "lucky" ones that gets more than itchy from installing fiberglas (He gets a full-blown case of allergic dermatitis, no matter how well covered he is). If he can spare me some discomfort and exposure to things I can't be exposed to (mold, copper green), the least I can do is spare him some in return.

Thanks, Daddy. I can't even tell you how much it means that you've helped us out like this. Especially now. It's the best birthday present in the world.

Thursday, August 17, 2006

Powdered House

I finished demoing out the ceiling in the diningroom bay addition yesterday.

Me: "OH MY GOD. It's powder. This was a beam."

EMT J (as distinct from Wiring J): "Is that like cancer for a house?"

Me:"Yes. Hopefully, it's operable, and not terminal."

We discovered the dryrot. Lots of it. In a place I was hoping against hope wasn't dryrotted. And after I stopped swearing, I made a plan of attack.

There was a leak from the rain gutter, maybe 30 years ago, that was allowed to EAT AWAY THE SUPPORT MEMBERS of about a 2'x8' section of the bay roof. And the roofers who "fixed" it just put up a really heavy sheathing board over the hole (I'm guessing 1" ply, since I can SEE it through the approximately 2x1 foot ragged hole in the old tongue and groove sheathing). The 4x4 beam that runs across the face of the wall has been reduced to powder in one place, and to an uneven 1x4 in others. The crosspieces that allegedly rest on it are damaged, so they really more hang near it.

The bay is literally being held up by the roof sheathing resting on the house sheathing (thankfully, some hard wood in big planks, topped with good solid wood lap siding). Oh, and the windows, with their trim.

Shudder. SH@# F@#& D#^* M@&^*@#$^$@#!

So, we have a lot of yanking of trim and reframing to do, which puts us back a good week or two, optimistically. Last night, we bought a shopvac to "demo" the powdered wood with, plus some filter bags to catch the yuck. Today, we are off to buy the replacement lumber.

Good thing we already have a nice stash of salvaged 2x4's. We'll need them to build the temporary supports.

Sunday, July 16, 2006

bathroom demo complete, plus bonus wound report

Look, the idiot is dancing again. But this time, she is limping.

The good news: the bath demo is done! The tiny tub (very HEAVY but also tiny) is out, and awaiting removal* in our otherwise empty living room. The appallingly designed, 1970's, also tiny (below crotch level on a small woman), sink vanity was ripped out (and destroyed) with glee yesterday. The sink and bath had a strange synergy going - the tub is a wave-front, streamline designed built-in tub, and the vanity was a flat-sided box that was installed rightupagainst the tub, leaving a little pocket between the head of the tub and the side of the vanity, where water and a half dozen washcloths had gathered over the years.

Not surprisingly, I had to rip out several punky floorboards, but the subfloor is very intact, which means that patching that spot on the floor before installing the tilebacker is going to be a piece of cake (all supply lines run through the wall, so no cutouts even need to be made!). Yuck, but fixable. AND - no termite damage, just old mold rot, which is now well dried out (the house was not lived in for 2 years before we bought it and we didn't use the tub or sink at all) and gone.

All the Vile Stinky Tile Adhesive came down with the plaster coat it had been attached to. The bare lath looks a heck of a lot better, and smells better too. Funny how much bigger the little room looks when it's empty...

We have elected to keep the old, high-flow toilet, as we like it, but it's getting pulled gently and set aside until the hardibacker is laid and skimmed.

The plumbing is demoed, too, so now we know what we need to get - and what we forgot to get. Like the tub overflow valve...and the drain pipe parts. Nothing quite like discovering you forgot to get something essential when elbows deep in a job. Sigh. We also have nowhere to go when working on the house. Well, I have nowhere to go. For the guys, there are plenty of trees in the backyard...

The bath wiring is also complete - J was putting in the two new GFI outlets as we left last night. The box for the wall fixture was put in, and the ceiling fixture was pulled out (even if it's nice, I really don't need to climb 9 feet up to screw around with a wet fixture to change bulbs in the middle of the night). The hole will probably end up holding a through-attic vent, since the enclosed back porch covers the only window.

That window opens, but it hinges open against the showerhead. The window predates any shower in that bath, so it's a matter of old laziness (I think the PPO, when they fixed the house up for sale in 1949). I say this as it is an easy fix - swap the hinges and latch from one side to the other. I want to pull and strip the hardware anyway, so why not fix this issue now?

We have also come to a decision about the 1940's - 1950's medicine cabinet - we're selling it. We'll put in either the original cabinet (found under the bay addition, and in need of restoration) or an equivalent repro. Craftsman-style wall cabinets are popular and can be had fairly cheaply these days, so it comes down to whichever is the less expensive option for now.

Now, we get to the limping part. I caught my shoe on a multi nailed scrap yesterday, and thinking I had shaken it off, put weight on my foot. No such luck - it had caught me and I got punctured. My foot HURTS, but the nail was a clean one, I've had a Tetanus shot in the past few years (in '99) and we have a first aid kit handy. My foot still hurts, though. I'll live.

* This gets mentioned last. My husband was theorizing yesterday about uses for the ex-tub. Like a fishpond, or planter. In the yard. I think he's pulling my chain. I hope he's pulling my chain. I'm all about reuse, but that's a little rednecky, even for me.

Here's an example of his sense of humor:


My advice? Don't sit on the smudged lid of a spackle can in black pants when he's around ... whether he has a camera or not.

Sunday, April 23, 2006

Beauty from ugliness

It's really amazing what a difference patching and applying a skimcoat over a cracked, be-holed, and befouled plastered surface can make. My morale went up about 10 points yesterday. My kitchen nears completion, and approaches paintability. As do my son's room and our dining room. FX's room, actually, is so close to completion that I think we might just get it done in the next couple of weeks. The ugly, dented and cracked outer corners in both dining room and kitchen look like new. I love patching plaster. The cleanup can bite my butt (I hate that part), but the process is a dream.

In other news, the breaker box is ready for installation, with its new home cut into the cellar stairwell wall. We have real outlets appearing as if by magic throughout the house (J and K have earned my finishing and structural carpentry slavery many times over with their help on this, and I think I promised yesterday to help K with a cheapo kitchen makeover this fall...).

There is hope in my heart! We may even move in before my next child arrives (I say that as if he's hovering in a holding pattern somewhere overhead, but he goes with me to the house every time...).

No pictures, as usual. I didn't think the changes would be so dramatic, so I didn't bring my camera.