Showing posts with label easy. Show all posts

Thursday, June 09, 2011

Pinwheel Striped Apples


These are what we call "Pinwheel Apples" around here. They are, essentially, sliced apples reassembled using peanut butter as glue. These are great easy snacks for mom to make, or for kids to make with some adult help (like slicing).

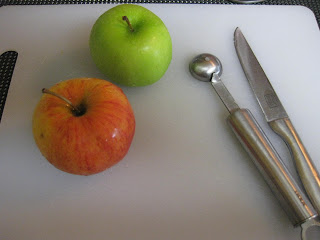
They look really festive if you choose two nearly identical apples of different colors, like these:

To make them yourself, you will need:

  • 2 apples as close in shape and size as possible
  • nut or soynut butter
  • a cutting board
  • a sharp knife
  • a melon baller
  • something to serve them in ( I like to use colorful Ikea kids' bowls)


The first step is to wash the apples, then dry them and cut them in half along the core:


Using the melon baller, cut out the cores. Using the knife, cut out the stems and any remaining flower bits at the bottom of the apples.
You will have 4 nice clean apple halves and a pile of stuff to put in your compost.

Get rid of the compostables, and slice the apple halves into fairly standardized slices (a little variation is okay). Get out your nut or soynut butter.

Hold one hand cupped, and start reassembling an apple in your palm, using slices of alternating colors:

Add a spoonful of nut butter, and keep adding slices until you get a fairly complete apple. You should be able to maintain the alternating stripes of color all the way around, if you were careful about cutting your slices.

Press the completed apple together with cupped palms to help it hold its shape and set in a bowl or saucer to serve. If it's hot out, refrigerate for an hour or two before serving to help them hold together. Garnish with berries or other fruit (orange slices are also awesome).
This how-to is also available as a youtube video, with photos of more of the steps:

Enjoy!

Wednesday, February 10, 2010

Ikea MALA easel, hacked for two!


I have two boys, and inevitably, when one wants to draw or paint, both want to do it. We recently moved and reorganized/resized our art/school/creative play area, so we needed to replace our old easel, a Melissa and Doug adjustable height easel, with one that folds flatter when it's not in use.

We picked the MALA easel (not on the US website right now) at Ikea because it's really flat when folded, and that's what we needed. It's the same height as the old one, so my boys won't notice much of a difference in use.

The only issue I had with the new easel is one I've always had, and had previously solved with an additional sheet of paper and another clip, but it meant that if one boy is still using the roll and the other is done, boy one will have to wait for more paper. Not practical, and really a setup for sibling rivalry!

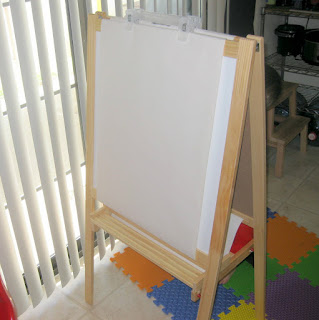
Well, Ikea also has a small, portable paper roll holder, also in the MALA line, and it happens to fit perfectly on the rails of the easel's roll holder/tool bin. So, I've combined the two, and with the assistance of clips, converted the easel to work for two artists at one time. This is the back side of the easel, where the white board is:


And this is the front, where the chalkboard/paper path is (say hello to underpants-superman, my assistant):

I've altered the paper path for optimum tension, as well as to make it easier to fold when not in use, and to make it a bit easier to trim off fresh masterpieces without having to re-thread the paper through the retaining slit. It goes through the slit, up and folds a bit over the top, where it is held with the clip.

The clips are repurposed garment hangers with integral spring clips. I like these, because they are sturdy, easily replaced, and the clips are widely spaced. This means that you only need one for a big sheet of paper, instead of two.

Here's a repeat of my initial image, so you can see the paper rolls and the paper paths from the side without having to scroll up and down:

The tabletop paper holder has one of its removable crayon trays removed (I just set that aside) and sits on the rails of the easel's paper holder, the paper goes up over the white board and is clipped with a second repurposed hanger. It's not attached permanently to the easel, because I want to be able to remove it easily so I can fold the easel flat for storage.

ETA: If you want to secure the paper roll holder to the easel, use two to four long velcro cable ties, and just wrap them around the foot of the roll holder and the tray bar. The structure of the easel and the roll holder help to keep it in place, but if you need extra peace of mind, this works quite well .


All I have to do to fold it flat is to un-clip the secondary paper at the top, pick up the small paper holder, roll up the paper, and put the other crayon tray back in. Then I can put it up, and fold the easel flat, slide it next to the desk, and both are put away. Even adding in the crayons, that's less than 2 minutes for cleanup, which is fantastic with 2 busy kids in the house!


Underpants Superman gives the idea The Purple Crayon of Approval. So do I!