Showing posts with label kids_in_the_kitchen. Show all posts

Thursday, June 09, 2011

Pinwheel Striped Apples


These are what we call "Pinwheel Apples" around here. They are, essentially, sliced apples reassembled using peanut butter as glue. These are great easy snacks for mom to make, or for kids to make with some adult help (like slicing).

They look really festive if you choose two nearly identical apples of different colors, like these:

To make them yourself, you will need:

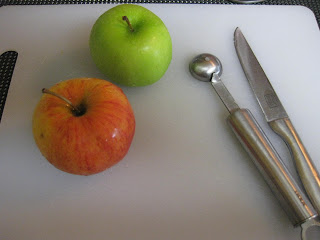
  • 2 apples as close in shape and size as possible
  • nut or soynut butter
  • a cutting board
  • a sharp knife
  • a melon baller
  • something to serve them in ( I like to use colorful Ikea kids' bowls)


The first step is to wash the apples, then dry them and cut them in half along the core:


Using the melon baller, cut out the cores. Using the knife, cut out the stems and any remaining flower bits at the bottom of the apples.
You will have 4 nice clean apple halves and a pile of stuff to put in your compost.

Get rid of the compostables, and slice the apple halves into fairly standardized slices (a little variation is okay). Get out your nut or soynut butter.

Hold one hand cupped, and start reassembling an apple in your palm, using slices of alternating colors:

Add a spoonful of nut butter, and keep adding slices until you get a fairly complete apple. You should be able to maintain the alternating stripes of color all the way around, if you were careful about cutting your slices.

Press the completed apple together with cupped palms to help it hold its shape and set in a bowl or saucer to serve. If it's hot out, refrigerate for an hour or two before serving to help them hold together. Garnish with berries or other fruit (orange slices are also awesome).
This how-to is also available as a youtube video, with photos of more of the steps:

Enjoy!

Saturday, August 29, 2009

Summer Popsicle Bites!

Don't these look wonderful?


We love smoothies in summer. I like to use a mix of fresh and frozen fruit and juices, so we get a nice slushie type smoothie. No matter how much we make, though, after I fill the cups, there's always a little bit left, and it's not fair to give one person extra.

So, I put it in a fun-shape ice tray (mine are from Ikea, but you can get them just about anywhere) and freeze it overnight. Sometimes I do this with juices, too, but those melt so fast the kids don't really like them as much. Of course, you can use a regular ice tray, but the fun shapes get a response that's an order of magnitude greater than a regular icecube shaped fruit pop.

Today's fruit pops are hearts made from a mix of peaches, plums and tropical fruit with apple and orange juice and a star made with apple juice. Here they are dished up for tonight's dessert, perfect to keep two overheated little boys happy on a nearly record-hot day:

Tuesday, May 19, 2009

Play Dough!


I made this lovely play dough from this recipe over at Cooks.com. There are easily a hundred different play clay recipes there, but this one was similar to an old one that I had tried before and really liked, but no longer had a copy of (isn't that always the way?).

It's a cooked corn starch salt dough, with a little oil for consistency and to help prevent sticking. This version has you color AFTER cooking.

I made a few small changes, of course, because I'm one of those cooks, and I can never leave anything alone. Here's how I did it, based on this classic recipe.

First, measure out the cornstarch and salt. Do not pack the cornstarch down or you'll need more water! Then put the dry ingredients in your pot and mix well. Next measure your water and oil. Drizzle your water in and stir with a narrow spoon or silicone mixing spatula. Keep going until all the water is incorporated. it'll get kind of hard to stir, which is normal for cornstarch. It'll also be kind of gritty. That's the salt. That's normal too.

NOTE: I omitted the shortening and wintergreen oil and just used salad oil. One tablespoon goes in the pot, the rest is kneaded in later. Add the oil and mix it in a little, then turn on the heat. A medium-low burner is best, and it has to be stirred constantly until it's all cooked. It will get harder to do, and you have to keep scraping the bottom and sides of the pan (remember that spatula? You really need one for this part)or you risk scorching to uneven cooking of your dough. It'll get lumpy, mushy and translucent. Eventually almost all of it will be cooked, and then turn off the heat and just keep stirring it around the pan until any opaque or runny spots start to blend with the rest.

At this point, cover it tightly - a plate is fine if your chosen pot has no lid - and let it sit until it's cool, about an hour. Don't refrigerate it.

Take it out of the pan and knead it in a medium sized salad bowl to work out any lumps that have occurred, slowly adding the remaining oil. You can drizzle in a little more oil or a little water as needed if it's dry or crumbly, but remember that coloring will add moisture too and don't go overboard! Keep kneading it until it's nice and smooth, then divide it up into as many hunks as you want colors and put each into a ziplock bag.

You can either color it now, or let it sit overnight and color it in the morning. I used washable tempera paints to color mine. To do that, put a couple squirts of paint into each bag, seal, and knead until mixed. Add more paint until you like the color, but remember that the more intense the color, the more likely the dough is to stain, even with a washable pigment color. My bags took three double squirts for red, three for blue and two for yellow and they are relatively non-staining.

Store in plastic bags in a cool place.